Showing posts with label canning. Show all posts

Tuesday, August 16, 2016

Happy Canning: A Mini Guide to Food Preservation

Just a sample of what can be done with canning
 Preservation by canning is a great way to save food that you have a surplus of and to diversify your meals. It is also a great way to keep eating local, even in winter! Pulling out a jar of bright yellow peaches in the middle of winter? Call me over because that’s amazing. But why stop there? Jam, green beans, corn, salsa, pickles, soups, broths etc. The list goes on, and it could meet potentially everyone’s dietary needs and desires. I don’t know about you, but that sounds pretty great to me.
 
When deciding what to can its important to pay attention to what’s available to you at the time. Take note of what’s on sale and what’s going to get you the best bargain, or what you have growing in your garden. Most importantly though, look at what you think you'll want to eat later. Once you’ve figured that out, you’ll have to decide which canning method is best for that type of produce.

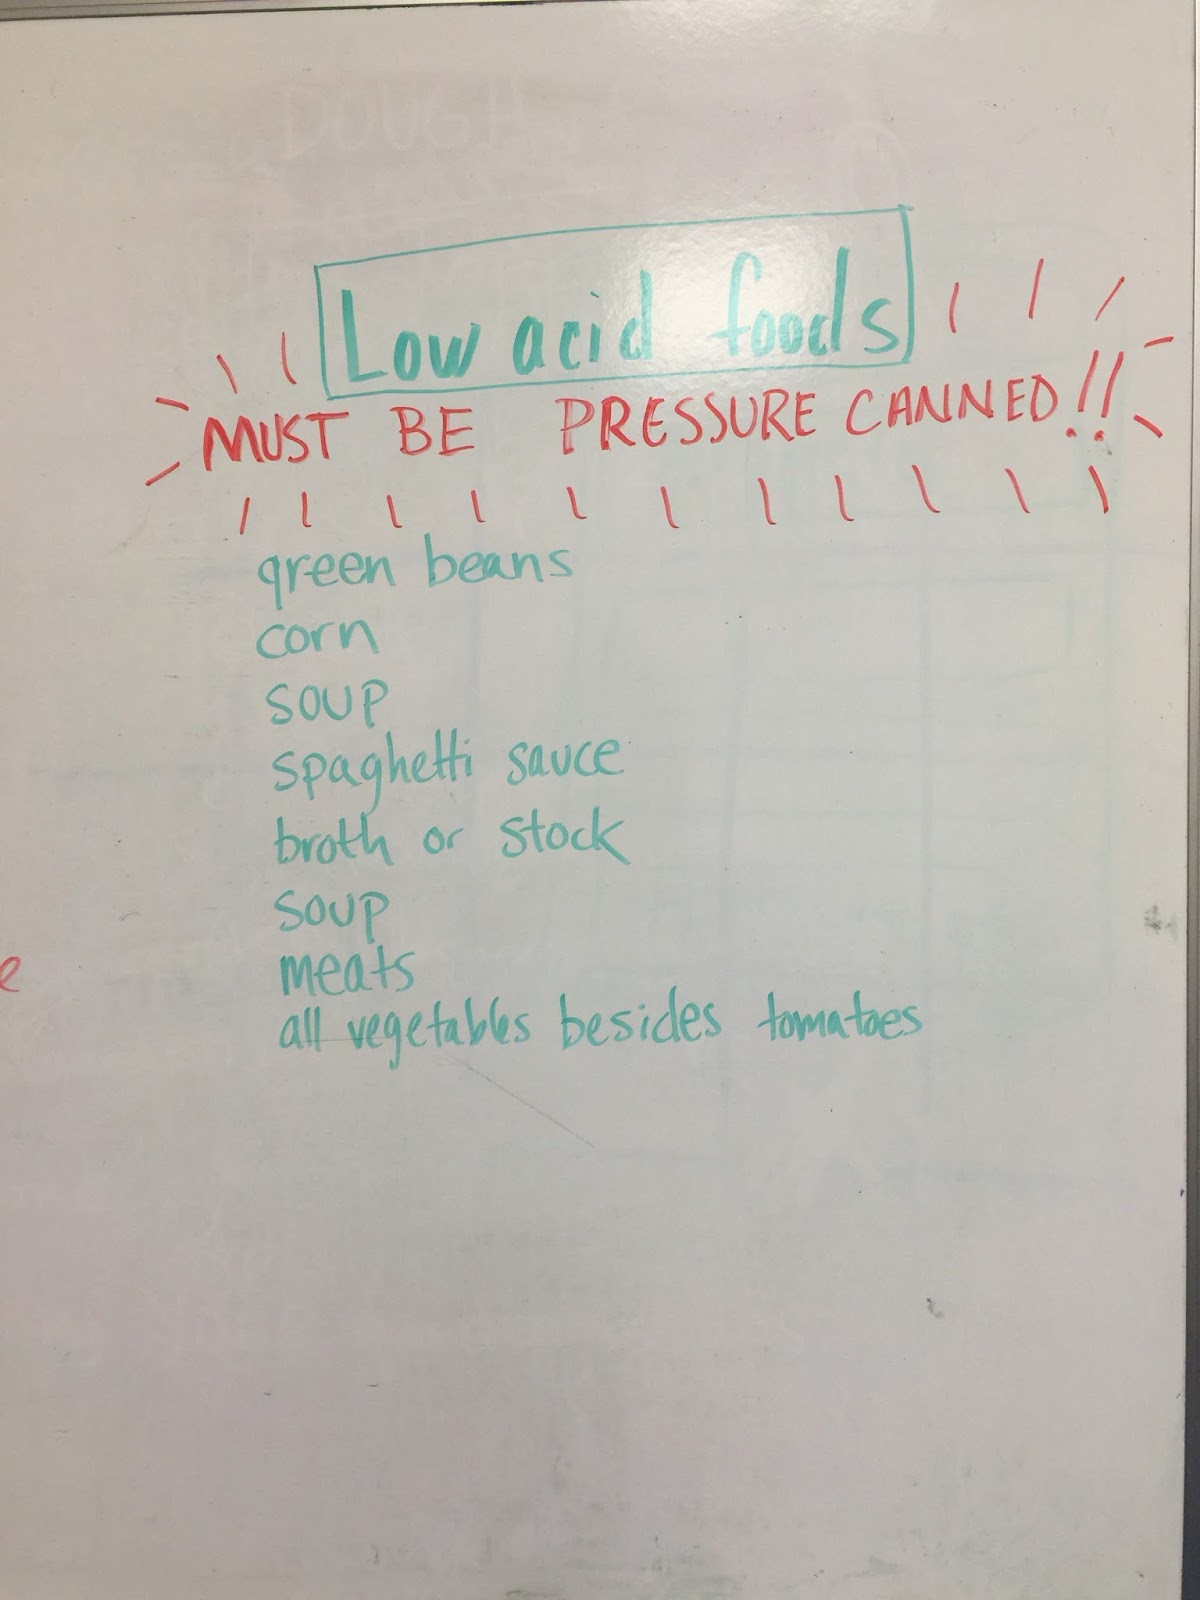
Now, bear with me here, okay? There’s only two methods of canning: boiling water bath (BWB) canning and pressure canning. The former can be used for all your high acid food needs; luckily, every fruit falls into this category, along with pickles, tomatoes (with added lemon juice) and acidified foods like chutney or ketchup. The latter is used for pasta sauce, soups, broths and veggies. Disclaimer! It is super important to use the proper method for the food your canning. Canning is a perfectly safe method of preservation, but you need to do your research, and follow instructions.

 If you’re new to world of canning, start with BWB because the cost is minimal and its used to preserve fruits and everybody likes fruit.

Next step is to choose a canning recipe from a reputable source and then follow that to the T. I mean it. Don’t try to cut corners to speed up the process. I guarantee you that every step in that recipe is for tasty food that is safe to eat. Nobody likes food poisoning; I can guarantee that. Canning is all about acid levels but you don’t need to know what chemicals do what. Simply follow that recipe and everything will fall into place.


To get started with BWB you'll need some of the following equipment:
  • Mason jars with two part lids. One to cover/seal and the ring to secure. The flat lid part needs to be new.
  • A pot that is at least 3 inches taller than your jars so that they may be submerged in water. And it needs to have a rack to keep the jars off the bottom
  • Canning tongs (DO NOT use kitchen tongs. They are not the same and you will hurt yourself)
  • Wide-mouthed funnel
  • Bubble tool (plastic knife works fine for small jars)
I know that may seem like a lot, but, you can purchase kits that have almost all of these materials for as little as $12. Great, right?

Now that we've covered all those bases, here are some fantastic resources for canning:
So, now you're ready to move forward and can the night away. Leave a comment below and let us know how it goes or if you have any question or concerns or simply share with us a recipe that you found to be a must-have. Until next time, happy canning!


Homemade peach jam


Tuesday, July 28, 2015

A Plot of Community Food Security: one patron’s story

Here at the Hub we’re always encouraging folks to grow food at home, or in community gardens. We provide education and tools for gardening in our workshops and tool share program. We also promote the benefits of home food preservation, to extend the harvest beyond the growing season and into the winter months. One of MHC’s patrons, Pearl Patton, is doing just that.

Pearl and Carl in front of the giant bed of beans in Pearl's garden.

A few of the jars of beans Pearl has already pressure canned this summer.
With the help of friends, family and neighbors, Pearl, age 72, planted the plot next to her house with corn, potatoes, tomatoes, zucchini, cucumber, two varieties of bush beans, and cabbage.  Last week she called on her community to help with the snap bean harvest, and has already canned thirty-five quarts with several pairs of hands picking and prepping.

“People are good to me,” Pearl admits.

She shares the food with her helpers and has donated beans to the MHC Food Pantry through the Plant a Row for the Hungry program.

Pearl is retired from 24 years at the Westinghouse plant in Bloomington.
“Those capacitors weigh a hundred pounds. I only weighed one-fifteen,” Pearl reminisces.

She says this is the first year she has planted the whole length of the plot since she gardened with her husband and children many years ago.  She says the high food prices last winter inspired her to expand from the quarter-plot she had been tending in recent years. Her housemate Gordon helped plant the garden and is keeping up with the weeds. Carl, who proxy-shops at the Hub for Pearl each week, spent the day picking beans with her last Saturday. “I’d say we picked twenty gallons, and there’s still more coming,” Carl remarked, shaking his head, “that’s a lot of beans!”

While home gardening and canning may be growing in popularity with a younger crowd, it’s nothing new for Pearl.
“I grew up on a 321 acre farm near Harrodsburg. You had to work or go hungry,” she remembers.

“One time I got the measles and had to stay home from school. My dad said ‘oh good, we got three hundred pounds of taters to plant.’“  Pearl recalls that being out in the early May sun made her measles itch more, but her dad told her, “don’t stop to scratch, keep droppin’ taters.”  The next day she still itched, but decided she’d rather go to school.


Pearl expects to harvest “a truckload” of cucumbers, and plans to donate a portion of those to MHC, as well as any other excess produce she doesn’t put up or give away. Pearl’s garden is a good reminder that building community food security isn’t rocket science, it’s just good ol’ fashioned common sense.


Monday, June 23, 2014

Canning Season is Here

Canning is a great way to take control of the foods we eat. When you process fruits and vegetables yourself, you know where they come from, and what has been added to them. You can avoid excess sugar and unwanted preservatives, and still enjoy safe and tasty home-cooked products. In the winter time it’s satisfying and comforting to go your own kitchen cabinet for beautifully preserved, locally grown, summer foods. The process of canning is also interesting and fun to do with a partner or friend.

We offer three canning workshops at Mother Hubbard's Cupboard each year, and will also offer demonstrations at the Saturday Farmer's Market in July and September. But if you have some produce that needs to be put up, you probably can't wait until our later summer workshops and demos. Here's the basics to get you started, and some links to recipes and methods. 
Canning is a process of preserving food by heating it to destroy unwanted micro-organisms and sealing it into a jar, to keep oxygen out. Some organisms can survive heating to boiling temperature, and an oxygen free environment. However, these organisms cannot survive in a high acid environment. So, to safely can foods using boiling water, you need to create a high acid environment inside the jar. To can products that are not high in acid, you need to heat the contents beyond boiling temperature, using a pressure canner.
The boiling water method is the one to use for canning tomatoes. Boiling water canning is only safe for preserving high-acid foods, such as most fruits, tomatoes (with added lemon juice) or foods with added acid such as pickles, catsup, salsa and chutney. Any time a low acid food is added to the product to be canned (such as onions, cucumbers or peppers) lemon juice or vinegar must be added (and a trusted canning recipe followed) in order to safely can with the boiling water method. Otherwise, you need to use a pressure canner 
It is easy to get started canning. You need a few special items, but most of them are inexpensive or easy to find second-hand. Consider going in on equipment with a neighbor, relative or friend, to reduce the initial investment. (You can also borrow them from our Tool Share program). For step by step instructions, see the Tomato Canning instructions.
You will need:
  • ball jars, designed for canning, these can be used over and over 
  • a canning bath (large enamel pot with a rack inside to hold the jars) or a large stock pot with some sort of rack 
    inserted 
  • flat lids designed for canning jars (these MUST be new. Do not reuse these) 
  • screw-on metal bands to go over the lids (these can be reused, and should be removed once the sealed jar has cooled) 
  • a jar lifter 
  • a canning funnel 
  • a clean small cloth 
  • ladle, spoon, knife and other basic utensils for prepping the food 
    Always be sure to follow trusted canning recipes closely. This is not the place to experiment, especially when it comes to the amount of vinegar or lemon juice required in a recipe. Tweaking spices to your own tastes is fine, just be sure keep the ratio of added acid to product consistent with a recipe designed for boiling water bath canning. Get your hands on a good canning book such as the Ball Blue Book of Preserving, or Putting Food By, and use that as your reference guide. County Extension websites (such as Purdue’s) are also great sources for trustworthy, detailed information on canning all sorts of foods. 
    Our goal is to empower you to get started canning, and to feel confident about preserving food safely at home. It is not difficult, just a bit time consuming. It is so satisfying, and at times even exciting, you may discover a new hobby! 

Sunday, July 14, 2013

Watermelon Pickles

(an old family recipe)

4 to 5 qts watermelon rind
Boiling water
1 T salt
1 qt cider vinegar
6-1/2 qts sugar (26 cups)
28 whole cloves
14 cinnamon sticks

Choose firm fresh melon with thick white rind. Peel and trim away all but faintest pink. Cut as desired – cubes, hearts, shamrocks, etc. (There are old-fashioned cutters designed for this sort of thing. Cookie cutters won't do because they're not deep enough.) The pieces should be about 1". Cover rind with boiling water; add salt. Bring to boil and cook 10 minutes, or until cubes can be pierced easily with a fork. Drain well. Squeeze out extra liquid. Pack in crock or enameled kettle.

Bring vinegar and 6 cups sugar to a boil; pour over rind. Let stand overnight. Each day, drain off syrup and bring the syrup just to a boil, adding more sugar as follows: first day 4 cups, second through fourth days 2 cups each day and fifth to 14th day days 1 cup per day. Skim if needed; pour back over pickles. (It won’t hurt if you skip an occasional day.)

On 14th day, pack the pickles loosely in hot sterilized pint jars. To each jar, add 2 cloves and 1 stick cinnamon. Cover with syrup, leaving 1/2" headspace. Remove air bubbles and adjust headspace if needed. Wipe rims of jars with a dampened clean paper towel and put on two piece metal canning lids. Process in a boiling water canner for 10 minutes. Makes 11 to 14 pints.

A Smaller Version - only about 3 pints

4 to 5 cups watermelon rind
boiling water
3/4 t salt 
1 c cider vinegar
6-1/2 cups sugar
8 whole cloves
4 sticks cinnamon

Choose firm fresh melon with thick white rind. Peel and trim away all but faintest pink. Cut as desired – cubes, hearts, shamrocks, etc. (There are old-fashioned cutters designed for this sort of thing. Cookie cutters won't do because they're not deep enough.) Cover rind with boiling water; add salt. Bring to boil and cook 10 minutes, or until cubes can be pierced easily with a fork. Drain well. Squeeze out extra liquid. Pack in crock or enameled kettle.

Bring vinegar and 1-1/2 cups sugar to a boil; pour over rind. Let stand overnight. Each day, drain off syrup and bring the syrup just to a boil, adding more sugar as follows: first day 1 cup, second through fourth days 1/2 cup each day and fifth to 14th day days 1/4 cup per day. Skim if needed; pour back over pickles. (It won’t hurt if you skip an occasional day.)

On 14th day, pack the pickles in hot sterilized pint jars. To each jar, add 2 cloves and 1 stick cinnamon.  Cover with syrup, leaving 1/2" headspace. Remove air bubbles and adjust headspace if needed. Wipe rims of jars with a dampened clean paper towel and put on two piece metal canning lids. Process in a boiling water canner for 10 minutes. Makes 3 to 4 pints.

Thursday, June 20, 2013

Pressure Canning


Preserving Food:
Using Pressure Canners

COOPERATIVE EXTENSION THE UNIVERSITY OF GEORGIA
College of Family and Consumer Sciences in cooperation with the College of Agricultural and Environmental Sciences

Pressure canners for use in the home were extensively redesigned beginning in the 1970's.  Models made before the 1970's were heavy-walled kettles with clamp-on or turn-on lids. They were fitted with a dial gauge, a vent pipe in the form of a petcock or covered with a counterweight, and a safety fuse.  Most modern pressure canners are lightweight, thin-walled kettles; most have turn-on lids fitted with gaskets.  At least one style is still made with heavy cast aluminum, has screw-down knobs around the canner and does not have a gasket, however.
Modern pressure canners have removable racks, an automatic vent/cover lock, a vent pipe (steam vent), and a safety fuse. Use only canners that have the Underwriter’s Laboratory (UL) approval to ensure their safety.
Today’s pressure canner may have a dial gauge for indicating the pressureor a weighted gauge, for indicating and regulating the pressure. Weighted gauges are usually designed to "jiggle" several times a minute or to keep rocking gently when they are maintaining the correct pressure. Read your manufacturer’s directions to know how a particular weighted gauge should rock or jiggle to indicate that the proper pressure is reached and then maintained during processing. Dial gauge canners will usually have a counterweight or pressure regulator for sealing off the open vent pipe to pressurize the canner. This weight should not be confused with a weighted gauge and will not jiggle or rock as described for a weighted gauge canner. Pressure readings on a dial gauge canner are only registered on the dial and only the dial should be used as an indication of the pressure in the canner. One manufacturer now makes a dual-gauge canner; read the manufacturer’s user manual for information on when and how to use either the weighted gauge or the dial.
Pressure canners come deep enough for one layer of quart or smaller size jars, or deep enough for two layers of pint or smaller size jars.  The USDA recommends that a canner be large enough to hold at least 4 quart jars to be considered a pressure canner for the USDA published processes.
Serious errors in processes obtained in pressure canners can occur if any of the following conditions exist:
  • The altitude at which the canner is operated is above sea level and adjustments in pressure are not made. Internal canner pressures (and therefore temperatures) are lower at higher altitudes. Canners must be operated at increased pressures as the altitude increases. Check reliable canning instructions for altitude adjustments.
  • Air is trapped in the closed canner during the process. Air trapped in a pressure canner lowers the temperature obtained for a given pressure (for example, 10 or 15 pounds pressure) and results in underprocessing. To be safe, USDA recommends that all pressure canners must be vented 10 minutes before they are pressurized.

    To vent a canner, leave the vent pipe (steam vent) uncovered (or manually open the petcock on some older models) after you fill the canner and lock the canner lid in place. Heat the canner on high until the water boils and generates steam that can be seen escaping through the open vent pipe or petcock. When a visible funnel-shape of steam is continuously escaping the canner, set a timer for 10 minutes. After 10 minutes of continuous steam, you can close the petcock or place the counterweight or weighted gauge over the vent pipe to begin pressurizing the canner. (See steps 3 and 4 below.) 
  • An inaccurate dial gauge is used. Dial gauges should be checked for accuracy each year before use. If the gauge reads high or low by more than two pounds at 5, 10 or 15 pounds pressure, replace it. If it is less than two pounds off in accuracy, you can make adjustments needed to be sure you have the required pressure in your canner.

Follow these steps for successful pressure canning:
(Read through all the instructions before beginning.)
1.    Make sure the pressure canner is working properly before preparing food. Clean lid gaskets and other parts according to the manufacturer’s directions; make sure all vent pipes are clear and contain no trapped material or mineral deposits. Center the canner over the burner. The burner and range must be level. Your pressure canner can be damaged if the burner puts out too much heat. In general, do not use on an outdoor LP gas burner or gas range burner over 12,000 BTU’s. Check your manufacturer’s directions for more information about appropriate burners.
Put the rack and hot water into the canner. If the amount of water is not specified with a given food, use enough water so it is 2 to 3 inches high in the canner. Longer processes required more water. Some specific products (for example, smoked fish) require that you start with even more water in the canner. Always follow the directions with USDA processes for specific foods if they require more water be added to the canner.
For hot packed foods, you can bring the water to 180 degrees F. ahead of time, but be careful not to boil the water or heat it long enough for the depth to decrease. For raw packed foods, the water should only be brought to 140 degrees F. 
2.    Place filled jars, fitted with lids and ring bands, on the jar rack in the canner, using a jar lifter. When moving jars with a jar lifter, make sure the jar lifter is securely positioned below the neck of the jar (below the ring band of the lid). Keep the jar upright at all times. Tilting the jar could cause food to spill into the sealing area of the lid.
3.    Fasten the canner lid securely. Leave the weight off the vent pipe or open the petcock.
4.    Turn the heat setting to its highest position. Heat until the water boils and steam flows freely in a funnel-shape from the open vent pipe or petcock. While maintaining the high heat setting, let the steam flow (exhaust) continuously for 10 minutes.
5.    After this venting, or exhausting, of the canner, place the counterweight or weighted gauge on the vent pipe, or close the petcock. The canner will pressurize during the next 3 to 10 minutes.
6.    Start timing the process when the pressure reading on the dial gauge indicates that the recommended pressure has been reached, or, for canners without dial gauges, when the weighted gauge begins to jiggle or rock as the manufacturer describes.
7.    Regulate the heat under the canner to maintain a steady pressure at, or slightly above, the correct gauge pressure. One type of weighted gauge should jiggle a certain number of times per minute, while another type should rock slowly throughout the process – check the manufacturer’s directions. 
o   Loss of pressure at any time can result in underprocessing, or unsafe food.
o   Quick and large pressure variations during processing may cause unnecessary liquid losses from jars.

IMPORTANT: If at any time pressure goes below the recommended amount, bring the canner back to pressure and begin the timing of the process over, from the beginning (using the total original process time). This is important for the safety of the food.
8.    When the timed process is completed, turn off the heat, remove the canner from the heat (electric burner) if possible, and let the canner cool down naturally. (Lift the canner to move it; do not slide the canner. It is also okay to leave the canner in place after you have turned off the burner. It is better to do so than to let jars inside the canner tilt or tip over if the canner is too heavy to move easily.)
While the canner is cooling, it is also de-pressurizing. Do not force cool the canner. Forced cooling may result in food spoilage. Cooling the canner with cold running water or opening the vent pipe before the canner is fully depressurized are types of forced cooling. They will also cause loss of liquid from jars and seal failures. Forced cooling may also warp the canner lid.

Even after a dial gauge canner has cooled until the dial reads zero pounds pressure, be cautious in removing the weight from the vent pipe. Tilt the weight slightly to make sure no steam escapes before pulling it all the way off. Newer canners will also have a cover lock in the lid or handle that must release after cooling before the lids are twisted off. Do not force the lid open if the cover locks are not released. Manufacturers will provide more detailed instructions for particular models.
Depressurization of older canner models without dial gauges should be timed. Standard size heavy-walled canners require about 30 minutes when loaded with pints and 45 minutes when loaded with quarts. Newer thin-walled canners cool more rapidly and are equipped with vent locks that are designed to open when the pressure is gone. These canners are depressurized when the piston in the vent lock drops to a normal position. Some of these locks are hidden in handles and cannot be seen; however, the lid will not turn open until the lock is released. 
9.    After the canner is completely depressurized, remove the weight from the vent pipe or open the petcock. Wait 10 minutes; then unfasten the lid and remove it carefully. Lift the lid with the underside away from you so that the steam coming out of the canner does not burn your face.
10. Using a jar lifter, remove the jars one at a time, being careful not to tilt the jars. Carefully place them directly onto a towel or cake cooling rack, leaving at least one inch of space between the jars during cooling. Avoid placing the jars on a cold surface or in a cold draft.
11. Let the jars sit undisturbed while they cool, from 12 to 24 hours. Do not tighten ring bands on the lids or push down on the center of the flat metal lid until the jar is completely cooled.
12. Remove ring bands from sealed jars. Ring bands can be washed and dried and put away for using another time. Put any unsealed jars in the refrigerator and use first.
13. Wash jars and lids to remove all residues.
14. Label jars and store in a cool, dry place out of direct light.
15. Dry the canner, lid and gasket. Take off removable petcocks and safety valves; wash and dry thoroughly. Follow maintenance and storage instructions that come from your canner manufacturer.

Reprinted with permission from the University of Georgia.
Andress, E. (2011rev.). Preserving Food: Using Pressure Canners. Athens, GA: University of Georgia, Cooperative Extension.